
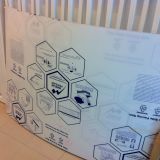
CIRP : Wiring plan
CIRP = Casa Idaman Renovation Project
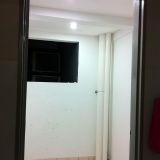
With the renovation work will start tomorrow, and the very first thing is to hack the walls for the additional sockets and switches of the added power points, I want to finalize the layout of my switches tonight.
I link it to be standardized, for example the first switch is for lights, the second switch is for ceiling fan. At the place I’m living now, the order is not the same, and always confuse me. When I’m in living room, I always switch on the ceilling fan, where I intended to switch on the lights since I already get used to the switch order in my bedroom.
So accompanied with a torch light and a pencil, I started drawing on the wall of the additional sockets that I want, and also the order of the switch to follow.
Living hall sockets – Need more 13A sockets for the various appliances. I also have added phone point and network point to link to the points in the study room.

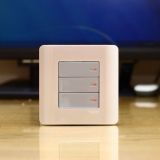
Living hall and dining hall switches – 3 gang switch that controls L-Box lights, downlights and ceiling fans. 2 gang switch will control the eyeball lights that I will point to the wall. 1 aircond switch for the cassette type aircond that I will install in between living hall and dining hall.

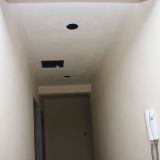
Adding light point if front of the door outside of my house, and also in front of the door inside of my house. Can you believe originally there’s no light point in the kitchen? So adding 1 downlight point for kitchen, and relocate the yard’s light point here.

Kitchen – Adding 2 more 13A sockets where the built-in oven and built-in microwave oven will be here. The third socket will be used for countertop lightings.

Kitchen – Relocate the yard’s light switch to next to the door earlier, and put 13A socket here. Later, will install Eubiq Power Supply solution here for all the electric kitchen appliances. I saw one at Ace Hardware Mid Valley.

Master bedroom – Will need 3 gang switch for L-Box lights, downlights and ceiling fan.

Guest bedroom – Adding additional point for ceiling fan and air conditioner. Doh! The air conditioner switch should be on the left.

Study room – Adding additional point for ceiling fan and air conditioner.

Study room sockets – Adding 2 more 13A sockets for various gadgets. The phone and network point will link to the one in living room.

** Read other stories about my Casa Idaman Renovation Project


hai..
charges untuk network point berapa ye?
seingat saya dia charge RM350. quite expensive sebab jarak ruang tamu ngan study room tu jauh, pastu cable network tu dia conceal dlm wall
any recommendation for wiring and grill contractor? how u appoint them? thru flen recommendation?
usually contractor will basically cover everything that you want to do by dealing with sub contractor for you. even though your main contractor will mark up the price a bit, but in the past i'm ok with that since i don't have to worry about dealing with several contractor.
i found mine from lowyat.net forum where I saw many people giving a good review about that contractor. i have a confidence to appoint that contractor since the guy have been in the forum for years, and i know if they don't do job properly, i will post the negative comments in the forum, and they don't really want that to happen 🙂