
Planted aquarium pilot try (phase 1)
It’s weekend, and it’s the best time for me to start with that mini planted aquarium project. It might take a while before the aquarium is ready to be planted. I took out all the plants from the sealed bag, and put it in a storage board filled with water, with light attached.

Took the aquarium out from it’s packaging, and gave it a good wash. I worry about the filter given some other time since I don’t really need it yet at this moment. But it seems quite easy to be assembled. Luckily the guide has english option inside (considering this is Japan product). But the rest, extra booklet given, product description on the box and leaflet of product description in the box are all in Japanese.
![]()
Before I sprinkle the substrate in, I just experiment on how to arrange the driftwood and planting rock inside the aquarium. It’s easy to move them around in a blank aquarium.

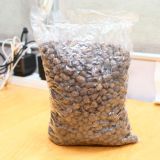
Layout decided, then I proceed with sprinkling the Africana ADA soil. In the most of the website describing on ADA setup, they all started with covering the bottom of aquarium with power sand, followed by Bacter 100, and finally the soil. I don’t go that way though. Getting another bag of power sand is quite expensive. Out of my budget already. LOL.

After I lay out the soil, I sprinkle the smaller pea size soil on top of my base soil. This will hold the plant steady after planted, where as the loose base substrate will allow plant’s roots to expand easily. Here’s how the 2 layers of the soil looks like.

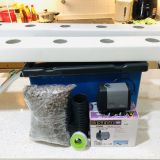
Next, I’m preparing the driftwood and planting rock. Preparing here refers to tying java moss to both driftwood and planting rock. I get the equipments ready. That brown thread seems suitable for my driftwood and the grey thread for the planting rock.

Oh my. It’s quite time consuming to arrange those java moss on the driftwood, and tie it tightly with thread. Finished at last.

Now I move to tying java moss to planting rock. And here’s the final result.

Time to get back to the aquarium. I placed both driftwood and planting rock that I have tied with java moss inside the storage box where I put the rest of the plants to prevent the java moss on the from drying out.

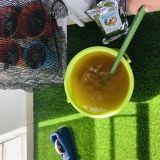
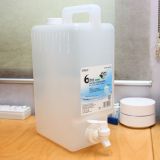
It’s time to pour water into the aquarium. I’ve placed a plate here, to prevent to prevent the soil from whirling up when the water is poured.

Then the water is poured on the plate.

Look. The water has finally covered all the soil, and the soil didn’t cloud the water at all. That why people says that it’s a magical ADA soil.

And this point of time, I moved the aquarium into my room and place it on my computer table. Since my bedroom is air conditioned, I can keep the water temperature in the range of 24 to 26 degrees celcius. I guess I just want the plants to be in the ideal water temperature while I’m setting it up, as well as I can keep myself cool. Sweating really bad outside just now when I prepare the soil. LOL.
So, I place the driftwood and planting rock inside the aquarium, and fill the water in until the show driftwood are under the water.

Oh. It’s getting late. I guess that I’ll continue again tomorrow.
Read the rest of the stories relating to this planted aquarium project:
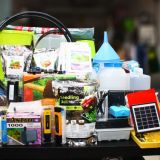
- Getting things for pilot try of planted aquarium
- Setting up planted aquarium (phase 1)
- Setting up planted aquarium (stranded)
- Setting up planted aquarium (phase 2)
- Final goods shopping for this aquarium
- Experimenting with water temperature
- Installing CO2 system
- Fermentation started, CO2 bubbles start flowing in
- More CO2 bubbles
- Worrying about pH and excess CO2 over the night
- Getting aquarium cleaners
- Getting final fishes for the aquarium
- Plants trimming


4 Responses
[…] Setting up planted aquarium (phase 1) […]
[…] Setting up planted aquarium (phase 1) […]
[…] Setting up planted aquarium (phase 1) […]
[…] Setting up planted aquarium (phase 1) […]