
Let’s make "CO2 Shake"
My planted aquarium is 1 week old already. It’s time to introduce carbon dioxide fertilization. People say you will notice a significant difference in the rate of plant growth once you inject CO2 into the water. It is something that I would try here.
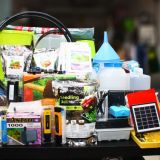
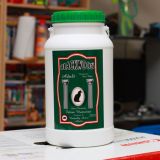
Below is the content of Nutratin CO2 Natural System. The fermentation container, basic reagent, stabilizer, activator, suction cups, reactor, tube and container holder.

First, I need to empty this basic reagent into the fermentation container. But by the look of it, it looks like sugar. I think it is sugar, but I don’t dare to taste it. LOL.

Then the sachet of stabilizor goes in which looks like baking soda. And lastly, the activator which looks like yeast (and again, I think it is yeast).

I pour the water in, give it a gentle stir, then I close the container’s cap.

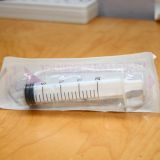
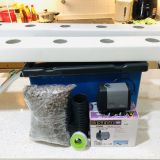
I then assemble the reactor (also acts as bubble counter) into the aquarium.

I hang the fermentation container behind the aquarium, and connect the hose.

Allrite, now I have to wait for 2 to 24 hours before the fermentation process starts. Can’t wait for the first CO2 bubble to come out.
And what’s with the title of making “CO2 shake”? Well. Throughout the process, I feel like I’m making Nescafe Shake. I still remember when I was still a kid, suddenly this Nescafe Shake became a boom, with a very catchy advert in the telly. I can’t recall which year. But what I can recall is – I insisted my mom to get the big jar of Nescafe as they have the shake container free with the big jar.
So to make this nescafe shake, you simply put nescafe, a bit of warm water (to dissolve the nescafe), milk, water and ice into the container, close it, and shake your bon bon. Then drink. LOL. How kids are vulnerable to tv adverts….
Anyhow, for easy future reference, here’s the instruction of the process from the box.

Read the rest of the stories relating to this planted aquarium project:
- Getting things for pilot try of planted aquarium
- Setting up planted aquarium (phase 1)
- Setting up planted aquarium (stranded)
- Setting up planted aquarium (phase 2)
- Final goods shopping for this aquarium
- Experimenting with water temperature
- Installing CO2 system
- Fermentation started, CO2 bubbles start flowing in
- More CO2 bubbles
- Worrying about pH and excess CO2 over the night
- Getting aquarium cleaners
- Getting final fishes for the aquarium
- Plants trimming


kok tag boardnya hilang ya,trus jadi bikin berat koneksi…apa punyaku aja ya?
feri.. hostingnya down buat masa ini. tak tahu bila koneksinya akan di’restore’
tinggi kos dia ek…
beli pokok plastik je laa kalu cam nih
tuh arr malique. pakai pokok plastik senang sket.. pokok hidup nih kalau daun luruh, kena remove cepat2. kalau dia time dia reput, menganggu kualiti air. pastu kena trim selalu, kalau tak mesti nampak serabut dlm aquarium tu. tapi i’m up for it. hehehehe
brother, u boleh DIY the CO2 lar…
gula, campur dgn air. Then a soda powder, and yeast. That is!!! DIY CO2!!!