How do I produce panorama picture?
This entry is dedicated to Zaif, on his question of what software that I use to generate panorama photo, even though he surely can figure out how the software that I use work on his own, being a computer whiz himelf. But I guess this entry might be useful for others.
Previously, I’ve been using PTgui to stitch photo. No doubt that it is very powerful, but I stop using it for two reasons
- It’s too complicated, where it involves quite a number of steps in getting the photo stitched
- No crack available out there. Eventually, the trial period ended and you cannot use it anymore
Now I have switched to using Pixtra Panorama Photo Stitching Software (http://www.pixtra.com/Downloads/download_PanoStitcher.htm).
This software is quite good, where you can have panorama photo done in 3 simple steps. Visit the link above to download the software.
And for evaluation purpose only, to get it registered, visit http://www.keygen.us/.
Search for panostitcher crack.
![]()
When you are presented with the result, download the one that I put the box around. Others not working (I have tried)

First of all, you need a series of photos that you take consecutively. The idea is to take photos from left to right. But if you take it in the reverse order, you can always reverse the order later in the software.
When taking photos, make sure the camera doesn’t move up and down, or forward backward. Rotate the camera on a single axis. Just imagine that you nailed the camera down at the middle. Try to rotate the camera when it’s nailed down (in your imagination of course). That’s is how you have to rotate your camera. Better still, use tripod.
Why is this important? Failing to do so, you will have parallex error, and the stithed images will not look good, or in worst case, it failed to stitch.
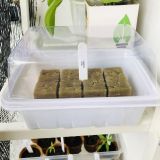
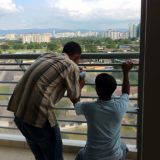
Let say I have the following photos (taken at my friend’s parent house at Ukay Perdana)

Fire up Pixtra PanoStitcher software. So, what are those 3 simple steps? Here they are
Load
First of all, load all the photos that you want to stich by clicking that Load button. The image order must be from left to right. If you shot the photos in reverse order (starting from right to left), reverse the order first. There’s also an option in the software that allow you to reverse the photo order. Go play with it yourself 😉

Stitch
Then, click that Stitch button. Depending on the size of your photos (i.e at what megapixel that you took the photos), and also the speed of your computer, it will take a while for the software to do the computation of finding control points that will be used for stitching.

Eventually, you’ll see your photos are stitched, roughly. From the above screenshot, you can see that the photos are in different intensity. Ideally, when taking photos in series, please lock the settings of ISO, EV shift, white balance etc. I’m not a pro myself, and I found this is quite hard to achive.
Blend
Lastly, click the Blend button. Remember the different intensity in the previous screen? Thanks to this function. It will try to correct those at its best, and blend the photos so it looks continuous.
Once done, it will show the stitched photo on the screen. You may save the photo now by right clicking on it, and choose Save at 100% resolution

Final Result
So, here’s the final result of the above exercise. Click on the photo below to get bigger view.

Pretty easy huh!!
Some hypocrite statements:
- blog.mohdimran.com does not responsible from any damage caused by using the above software and the crack
- blog.mohdimran.com does not support piracy in any way


imran, i wonder how much time u take before u really posting new entry in this blog, everyday!
u really doing blogging as serious work!
wow… kewlz software yek..
thanks for da info imran
aduh..
tak reti den.. hehehe..
kekekeke…. nak gelak pun ada dgn statement amirah tu…
anyway, very informative… yg ni saya tunggu juga dari Imran. Dulu tertanya jugak camna nak buat panaramic nih… tapi cam jelas nampak gambar tu bersambung2…
hehehe.. amirah. takdelah. saya nih bukannya full time blogger. saya menulis di masa free je. tentang masa tu, takdelah lama sgt saya ambik utk buat satu entri. just upload gambar pakai hello (www.hello.com), then tulis entrynya, pastu post 😀
fizz + malique + pinat: hehehe. so lehlah try nanti. memang senang bangat nak pakai software ni.